This session is mainly focus on the Microsoft AIP and DLP. In this session, we will be covering the key feature which covers under AIP and DLP point of view. Further, the session will include some live demos which includes data classification, Rights Management and Data loss prevention.
In this Blog I am going to show you how we can set the Retention Label Policies to your O365 environment using Microsoft 365 Security and Compliance Center.
As the first phase lets setup and Create Retention labels
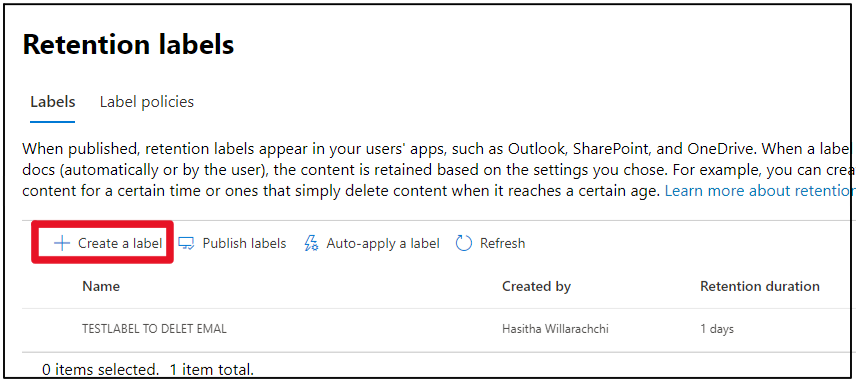
Step 2- When you are in the Home Page of Microsoft 365 security, on to your left side corner menu Click Classification > Click Retention labels.
Step 3- Next lets ClickCreate a label tab as follows.
Step 4- On the Name your label page, type a meaningful name, description and then ClickNext.
Step 5- Click Next while leaving the fields blank in the File plan descriptors menu. The reason is to test this retention label, these fields are not a must
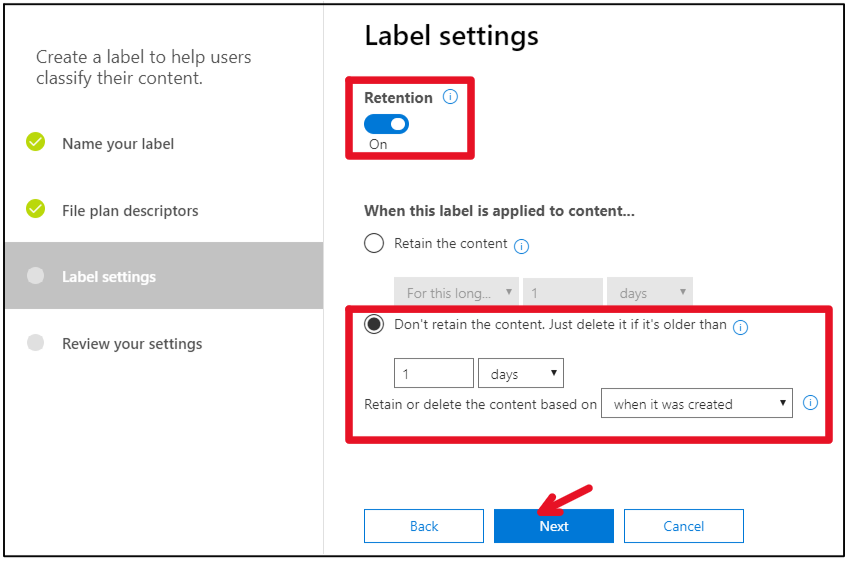
Step 6- On the Label settings page, if needed, set Retention to On, and I have configured the “Dont Retain the Content, just delete it if its older than 1 Day” and then ClickNext.
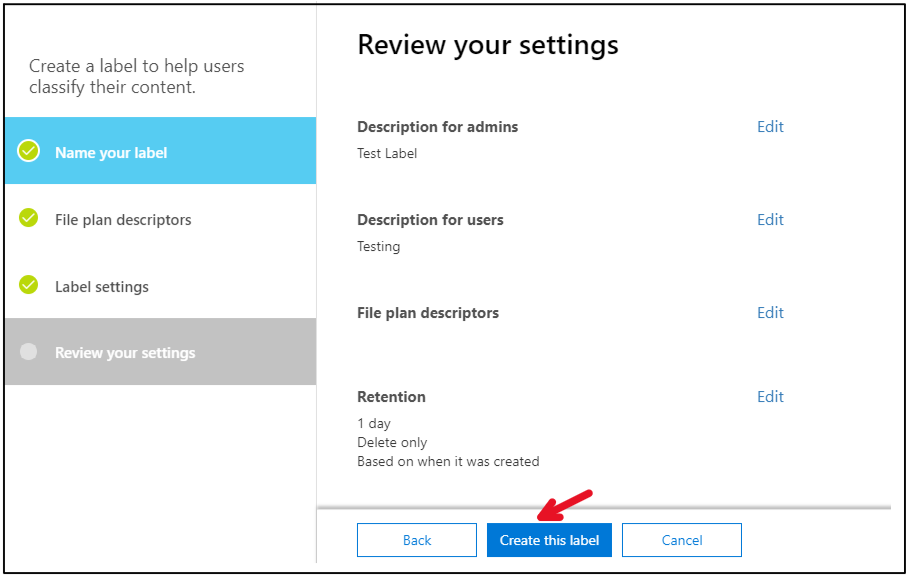
Step 7- Review your settings page, Verify all the setting you configured so far and ClickCreate the label Tab.
Step 8- Next is to Publish the created label. TO do so, Click the created Label and ClickPublish labels.
Step 9- On the next page which is in the Choose labels to publish page, Click Next.
Step 10- Click Next on the Choose locations pane while leaving the default settings as it is.
Step 11- Under the Name your policy page, just type meaningful name with a description and then B Next.
Step 12-ClickPublish labels on the Review your settings page.
Note: Once you publish the label, it might take sometime to appear in your applications.
On the Next phase lets apply retention labels to documents in Sharepoint.
This is a manual process which we going to set the retention label to a document.
Lets create separate site in our SharePoint online. As follows.
Step 13- Login to Office 365 portal using your global administrator account .and Click Create Site.
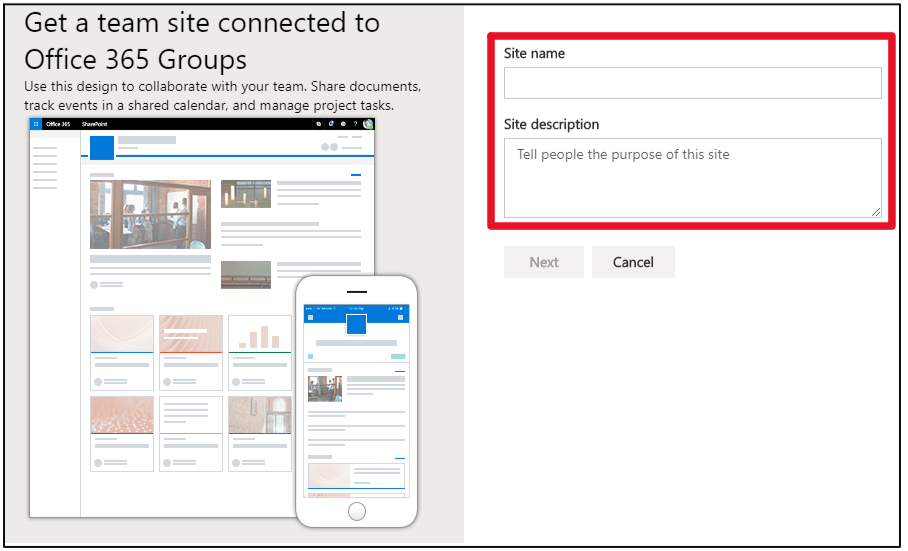
Step 14- On the Create a site menu, Click Team site option as follows
.
Step 15-Type a meaningful name for the Site Name.
Step 16- Also provide descriptive information in Team site description box and SelectPrivate – only members can access this site. ClickNext.
Step 17- Click Finish in the Who do you want to add? Pane while leaving the fields blank.
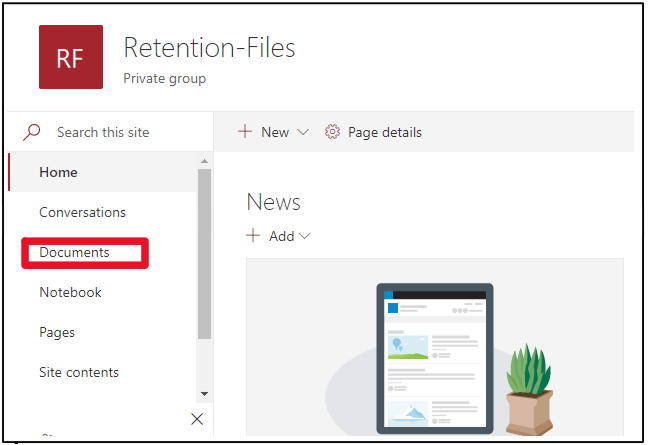
Step 18- Now lets go to the Documents folder of the Retention-Files team site for the Sensitive retention label. Next in the Retention-Files Site, ClickDocuments as follows.
Step 19- Next Click the settings icon, and then click Library settings as follows..
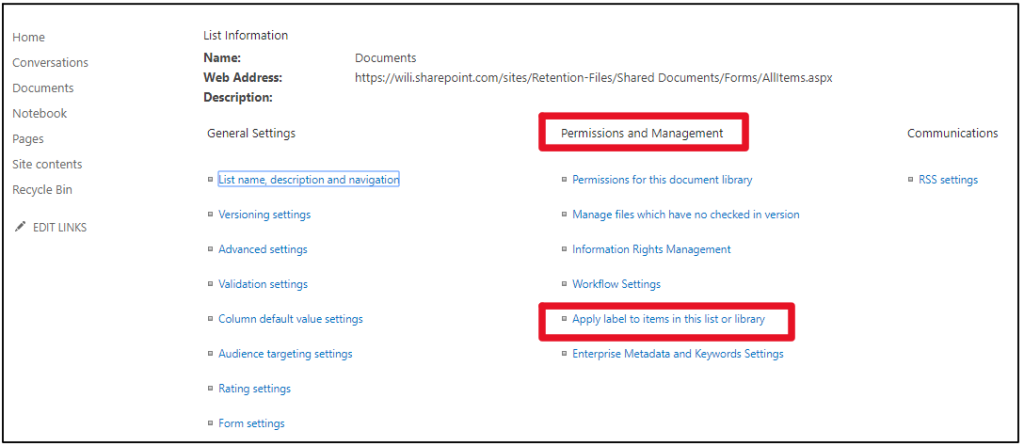
Step 20- On the Library Settings menu Under Permissions and Management, ClickApply label to items in this list or library.
Step 21- On the Settings-Apply Label menu, Select Retention Label You created from the dropdown menu ClickSave.
Next, create a new document in the SensitiveFiles site and change its retention label.
Step 22- Go back to the Document folder and ClickNew >Select Word document or anything you prefer and add some content in to the document and wait till it saved automatically.
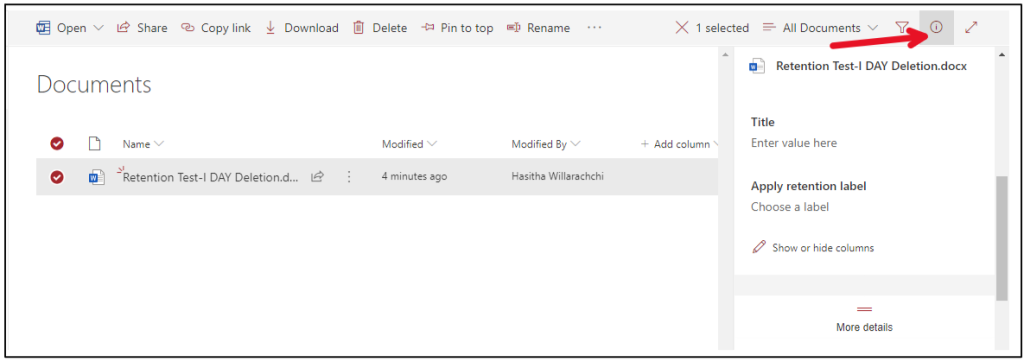
Select the Document you created and then ClickOpen the Details Pane > Properties > Apply retention label, You will visible that the document had the Retention-Public label automatically applied.
This way you can create multiple retention labels and apply them to your O365, SharePoint, One Drive using Microsoft 365 Security and Compliance Center.
Using the Azure Information protection Analytics logs the event happen when the data protection services is running for your organization such as documents and emails. This can log every request to it. These includes when users protect documents and email and also consume its content, actions performed by your administrators for this service and etc.
According to Microsoft the Central reporting will help you to track the adoption of your labels that classify and protect your organization’s data. In addition to this below are some of the other points which can mainly highlight.
The below are points copied from Microsoft site.
Monitor labelled and protected documents and emails across your organization
Identify documents that contain sensitive information within your organization
Monitor user access to labelled documents and emails, and track document classification changes.
Identify documents that contain sensitive information that might be putting your organization at risk if they are not protected, and mitigate your risk by following recommendations.
Identify when protected documents are accessed by internal or external users from Windows computers, and whether access was granted or denied.
Now lets start how to do this.
Step 1- Login to your Azure Portal with Global Admin credentials Select Azure Information Protection > Go to Manage > Click Configure Analytics (Preview)
Step 2- On the Azure Information Protection analytics menu, Click Create New Workspace as follows.
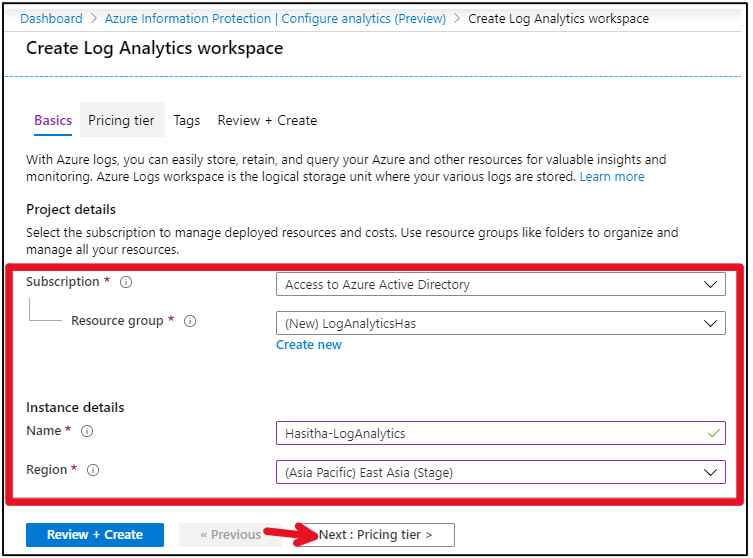
Step 3- On the Basic menu, Select your subscription > Create Resource Group > Give meaningful name to for instance > Select your region > Click Next.
Step 4- On the Pricing Tier, Click Next while leaving the Pricing tear as Pay-as-you-go
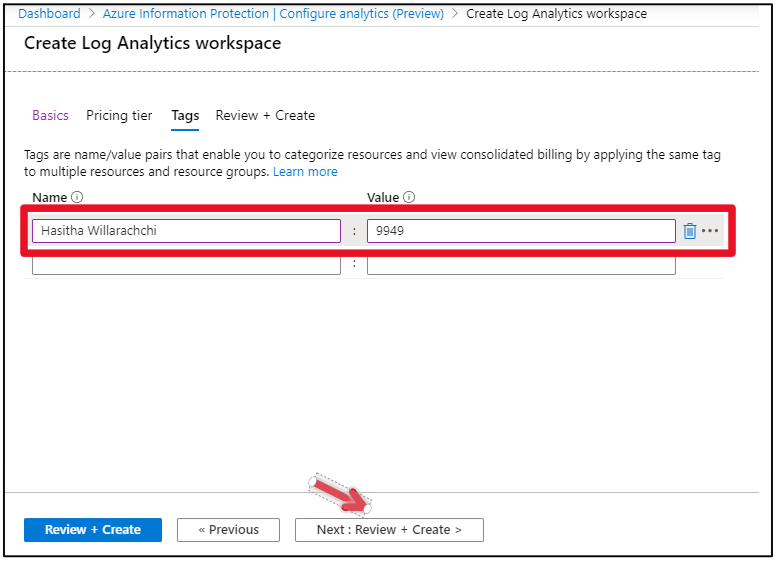
Step 5- On the Tag menu, you can leave blank or you enable you to categorize resources and view consolidated billing by applying the same tag to multiple resources and resource groups. Click Next
Step 6- On the last page Click Create.
Check the below screen to verify the deployment is success or not.
Step 7– Once this is finish, Go back to Information Protection menu, Under Manage menu, Click Configure Analytics (Preview) > Select the Wokspace you just created in above steps > Select OK.
Step 8- Go to Analytics Menu in Information Protection service, Click Usage report (Preview) to view the details. Since my tenant is newly created one, there is not data yet to show. Enjoy the day with log analytics 🙂