 What is System Center Service Manager 2012?
System Center Service Manager 2012 delivers an integrated platform for automating and adapting IT Service Management best practices to your organization’s requirements. Service Manager can help your organization to increase productivity, reduce costs, improve resolution times, and meet compliance standards.
Through its configuration management database (CMDB) and process integration, Service Manager 2012 automatically connects knowledge and information from System Center Virtual Machine Manager, System Center Operations Manager, System Center Orchestrator, System Center Configuration Manager,Active Directory Domain Services and etc.
Some of new features added in to System Center Service Manager 2012 are as follows:
- Self-Service Portal
- Orchestrator integration
- Service Requests / Release Management
- OLAP Cubes in Data Warehouse / Reporting
Before Install the SCSM 2012 you must make sure the following prerequisites are installed.
|
Service Manager Server component requirements(valid for all server components, including:- Management Server-database Server Service Manager Console Data Warehouse Server Self-service Portal |
|
| Database Server |
|
|
Service Manager console |
|
| Self-Service Portal |
|
|
Browser accessing the Self-Service Portal |
|
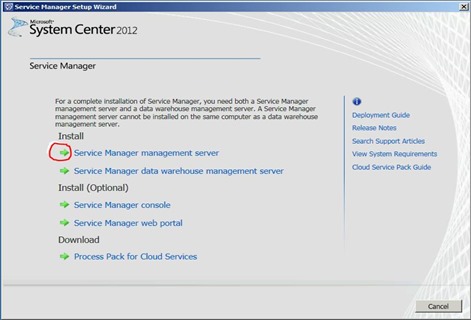
1- Open the setup file on SCSM 2012 and select Install the “Service Manager Management Server” as I highlighted on the below screen.
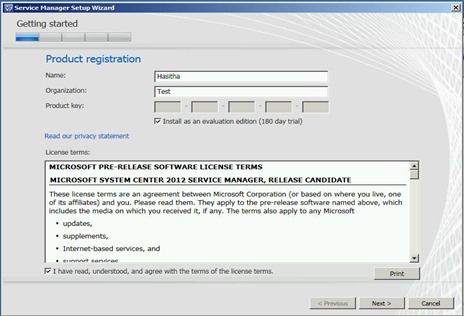
2- Accept the License Agreement and click “Next” to continue.
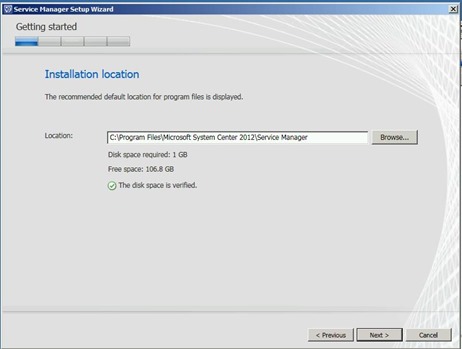
3- Select the installation path or leave the default installation path and click “Next” to continue.
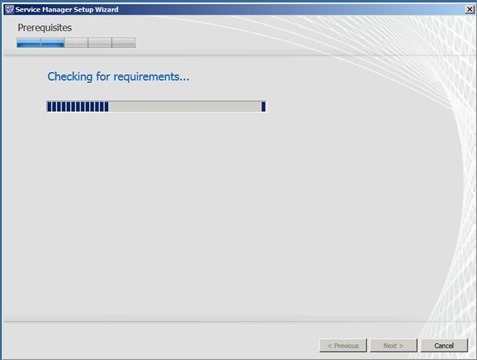
4- After you click Next on the above screen then next will scan the prerequisites which need for SCCM 2012 installation.
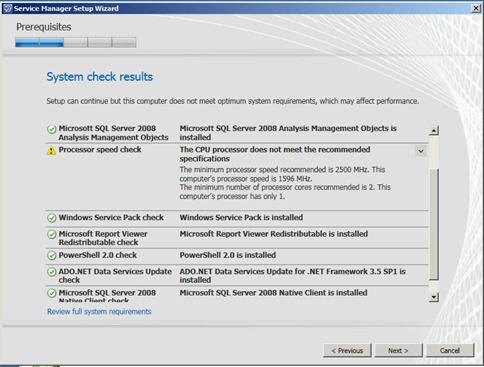
5- Once the prerequisites process completed it will give the System Check Results as follows.
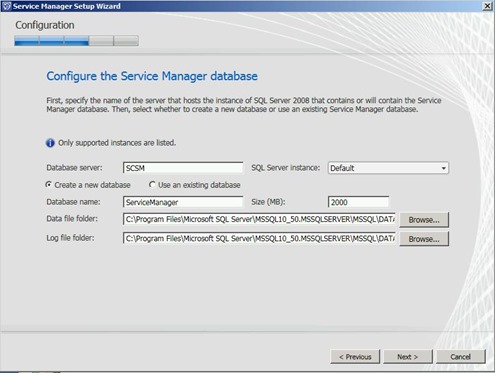
6- On the Service Manager Database configuration part select “Create New Database” option and Click “Next” to continue. In case if you want you can change the Database location and Log file installation path as well. In addition to that you can configure the Database size too. The default size is 2GB.
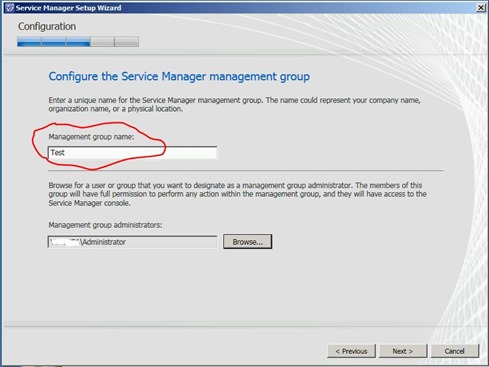
7- On the Management Group settings type a Friendly Name under the Management Group Name column and select the User to designate for the management group. I have highlighted the Management Group name in my screen as follows. ![]()
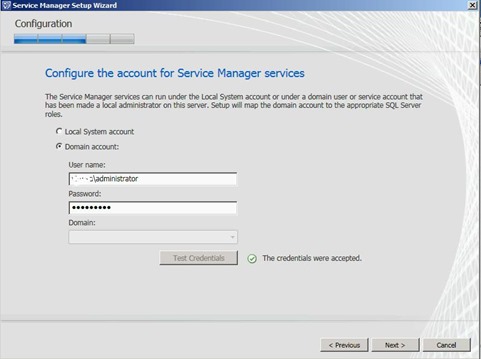
8- Add a user account who needs to have an access to Service Manager Services and click the “Test Credentials” tab to verify the username and password.
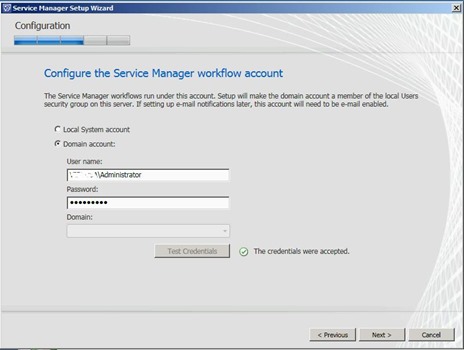
9- Add a user name and password to give the access to service manager workflow. This user name should have e-mail enabled because later on we need to set an email notification in SCSM 2012.
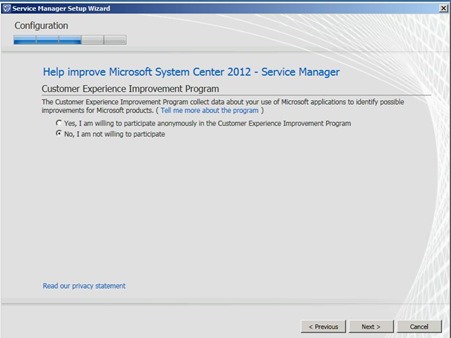
10- Select what ever you like on Customer Experience Improvement Program and click “Next” to continue.
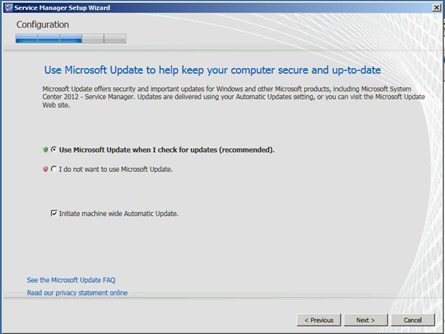
11- Select to have windows Updates once you finish the installation. Its recommended to updates windows patches as soon as you finished the installation.
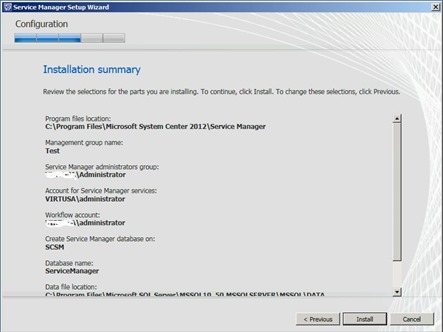
12- On the installation summary just verify the details and click “Next” to start the installation.
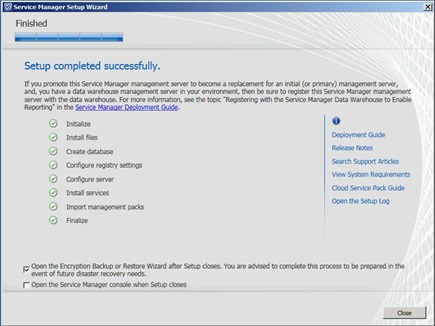
13- Once the installation completes you can verify it. Also select the option to complete the encryption key creation process to create a recover key in the event of future disaster recovery needs.
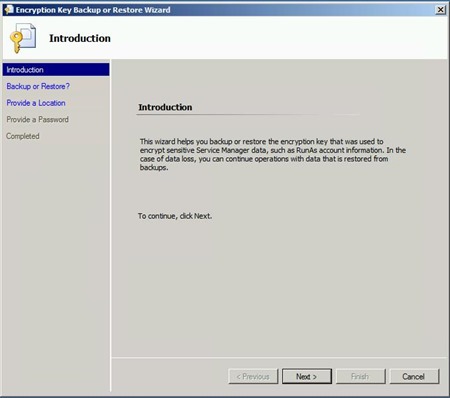
14- On the Encryption Key Backup and Restore wizard just click “Next” on the Introduction page.
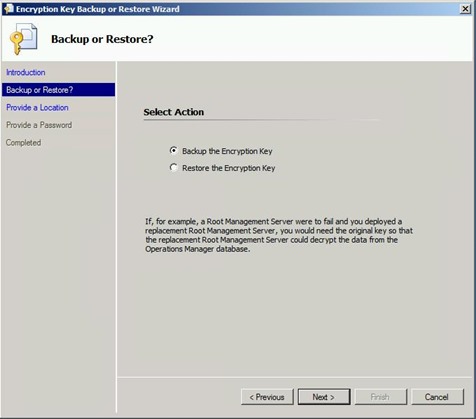
15- On the Backup or Restore wizard just “Select” Backup the Encryption Key and click “Next” to continue.
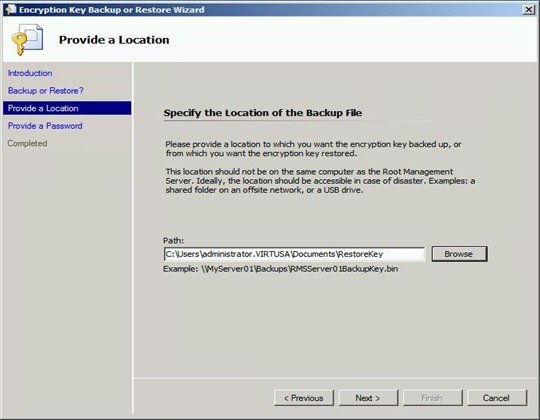
16- Specify a location to store the Key. But make sure to specify a Network location rather than selecting a Root management server and click “Next” to continue.
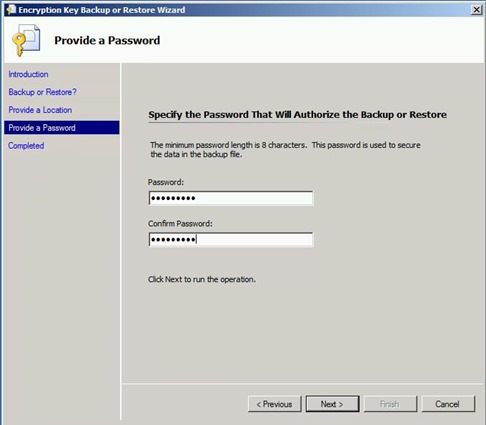
17- Type the Password which you want to have and click “Next” to continue.
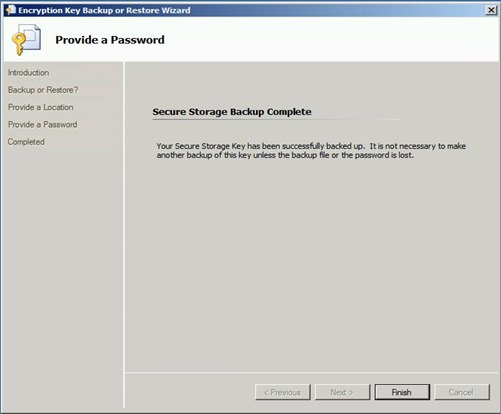
18-Once it created the Encrypted Key click “Finish” to complete the Encryption Key Backup or Restore Wizard.
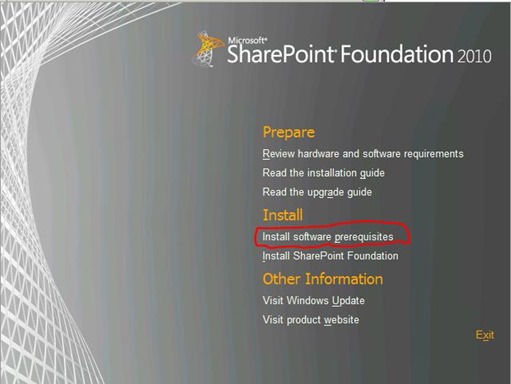
19- Now we have completed the Management Server Installation wizard and next is to install the Self-Service Portal of SCSM 2012. But before install the Self-Service Portal we need install some dependencies of it. As a first step we need to install Share-Point Foundation server on the server. But if you already have a Share-Point Server in your environment you can use it as well. But in this example I am going to install Share-Point Foundation server on the same server. Even to install Share-Point Foundation server you need to install some prerequisites. To install prerequisites you can use the following method which already available in the Share-Point Foundation setup wizard. I have Highlighted it in the below screen. Select “Install Software Prerequisites”.
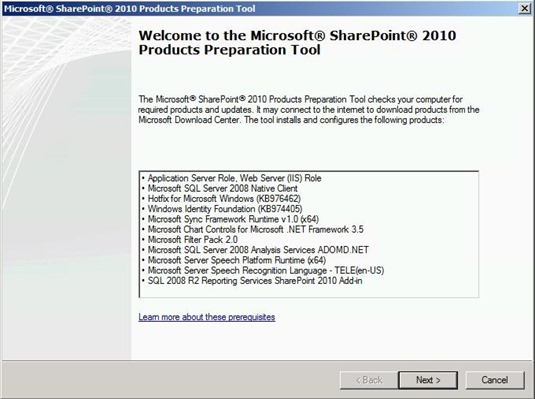
20- Once you select the “Install Software Prerequisites”, then you will get a list of products and updates which you need to install. The following screen indicates it. Click “Next” to continue.
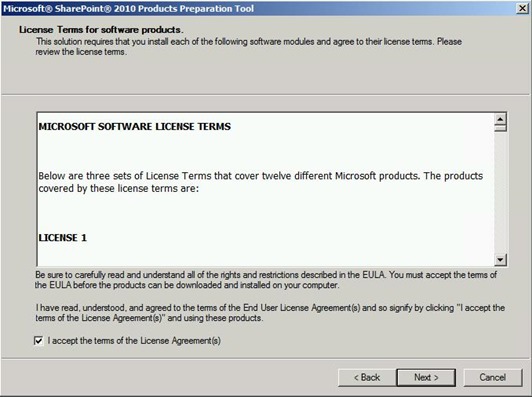
21- Once you verify the it just Accept the terms of the license Agreement(s) and click “Next” to start installation of the updates and products.
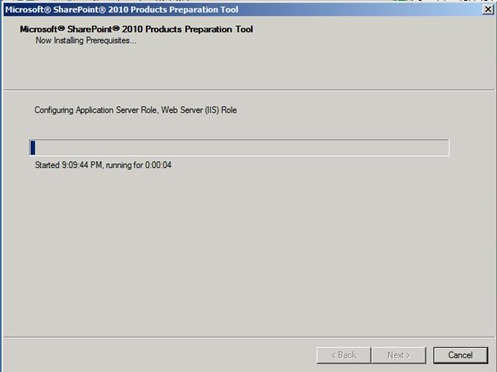
22- Then it will start to download the required patches and products from the internet. If you need you can manually download the required components and install it rather than letting it to download at this stage. Its your choice. ![]()
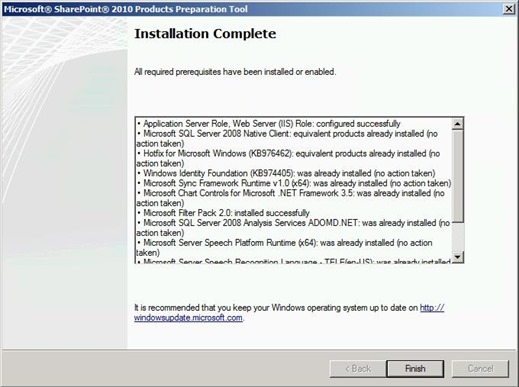
23- Once it downloaded the necessary files you can view the summary of it as shown in the below image. Then click “Finish” to complete the prerequisites installation.
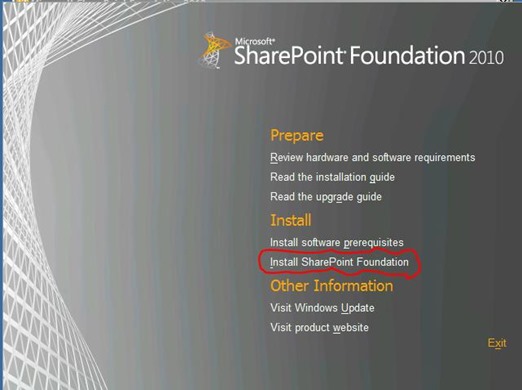
24- When Prerequisites installation completed just click the “Install Share-Point Foundation” tab as highlighted in below screen to start the installation of Share-Point Foundation.
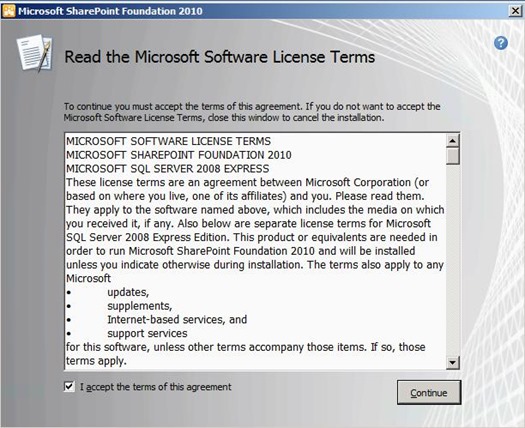
25- Accept the terms of this agreement and click “Continue” .
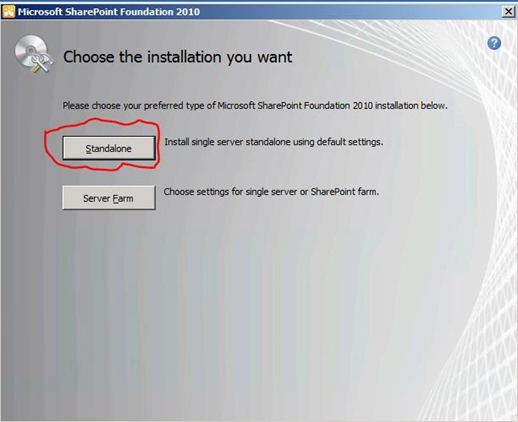
26- Select Standalone option as follows. If you select Standalone option then it will do necessary configurations to SharePoint server with default settings. If not you can select Server Farm option and do installation. But in my case I have selected the Standalone option. To continue click “Next”.
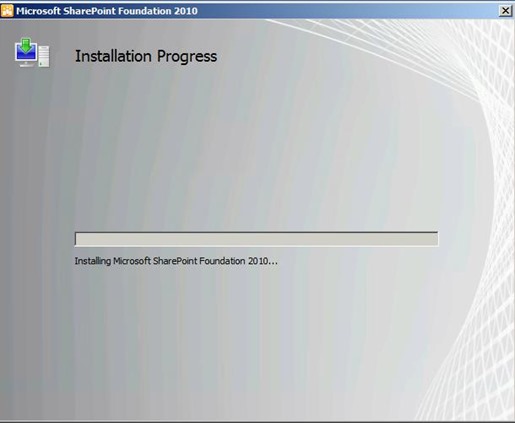
27- Installation will start and progress as follows.
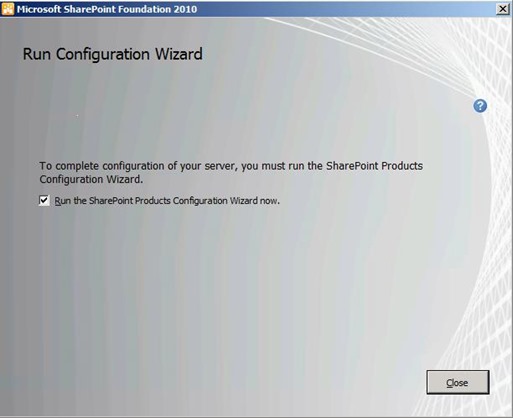
28- Select the “Run Share-Point Products Configuration Wizard now” and click “Close” button.
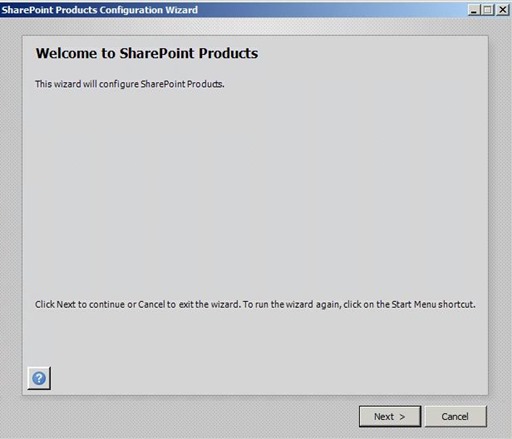
29- Once you press close button on the above screen then it starts of the Share-Point configuration wizard. Click “Next”
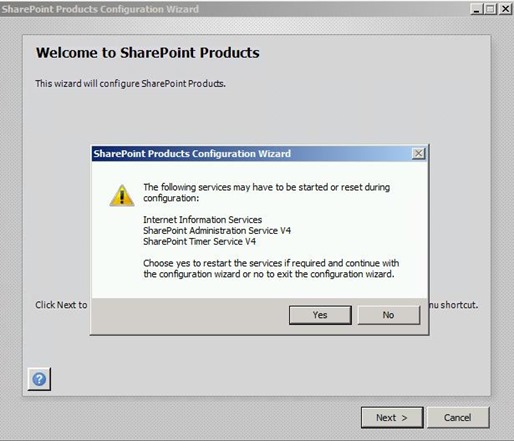
30- As per the following Warning Messages it may restart some services which runs in this server. Such as IIS Service, Share-Point Administration Service v4, etc… Click “Yes” to continue.
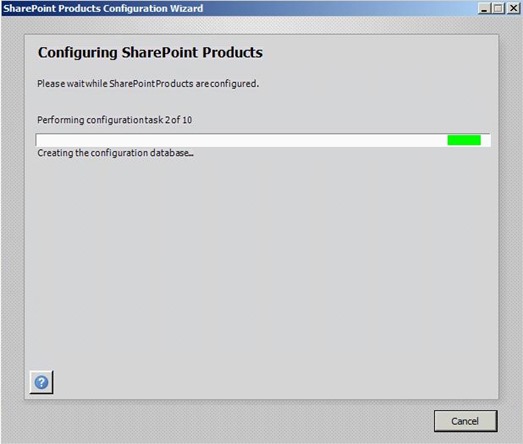
31- Then it will start the configuration setup based on its default settings as follows.
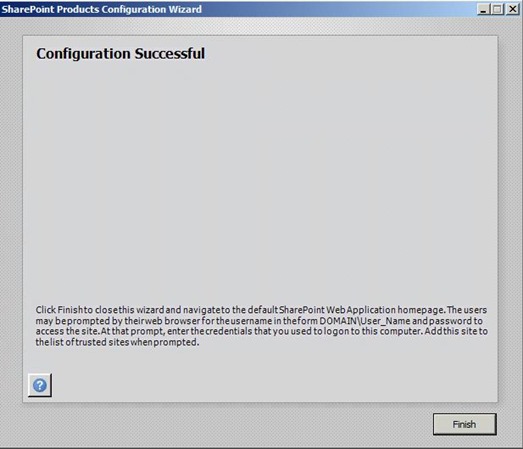
32- Once the installation Successful just click “Finish” to end the installation of Share-Point Foundation.
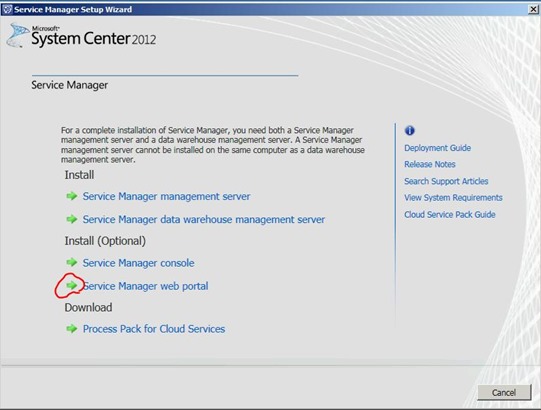
33- Once complete the Share-Point Foundation installation, next is to install the Service Manager Web Portal. To start the installation of it just click the “Service Manager Web Portal” as highlighted in below screen.
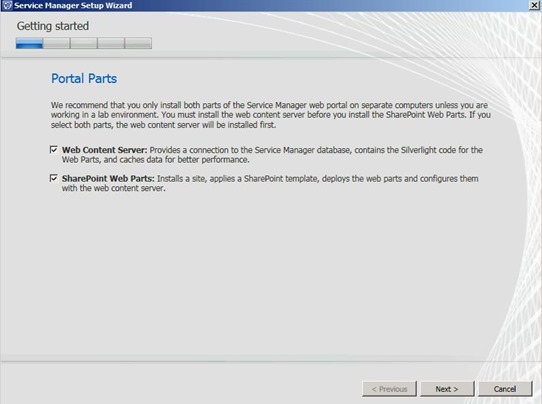
34- On the next screen Just select “Web Content Server” and “Share-Point Web Parts” options and click “Next”.
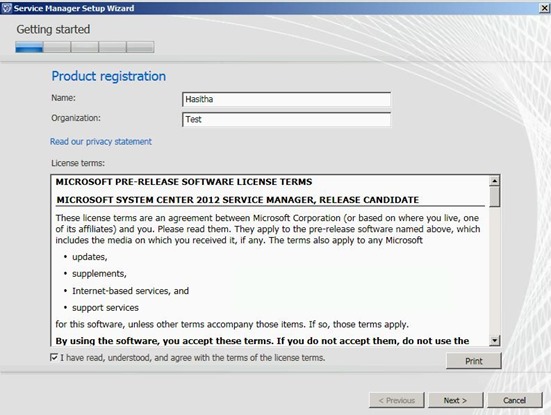
35-Agree to the Terms and conditions as follows and click “Next”.
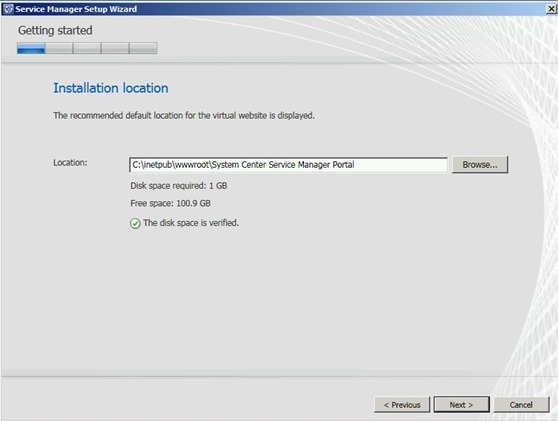
36- Select the Installation path as you want or let the default path to be there and click “Next” to continue.
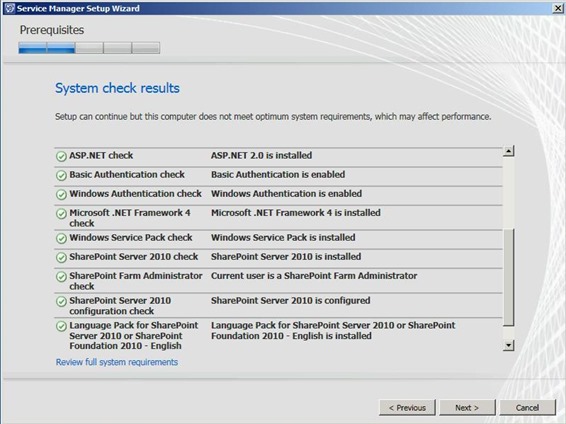
37- Next step will automatically check the prerequisites require to install service manager web portal. Once all the Prerequisites requirements are met just click “Next” to begin the installations.
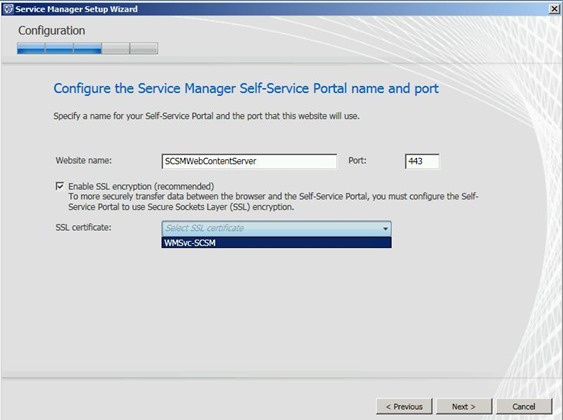
38- On the Self-Service Portal name and port wizard you can type what ever the Website Name you want and also the Port which users are access the portal. In addition to that select the “SSL Encryption” option and select the particular SSL Certificate from the drop down list as indication in the below screen and click “Next” to continue.
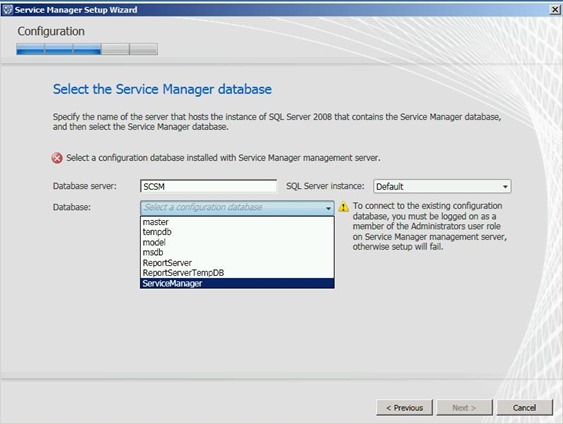
39- On the Service Manager database wizard “Type the SQL data base server name and also select the SQL database” where you want to install the Service Manager Database for self service portal as below screen and click “Next”.
40- On the next wizard type the domain user name who can access the service manager database and Test the Credentials and click “Next” to continue.
41- On the Service Manager SharePoint Web Site wizard Type the SharePoint Site Name as you want or let default name to be there. Also “Enable” the SSL Certificate and “Select” the database server and click “Next”.
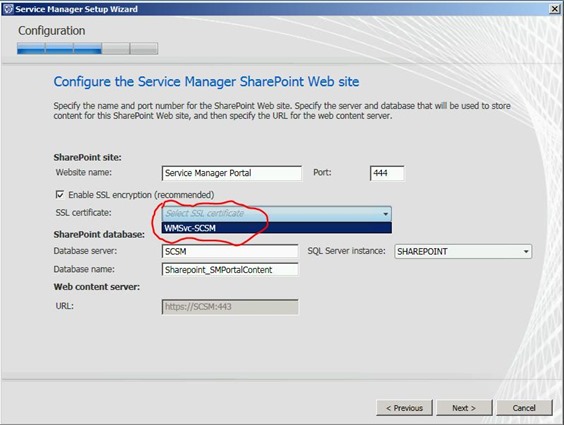
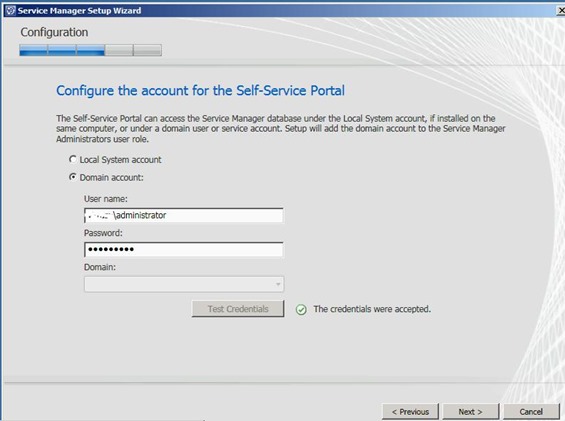
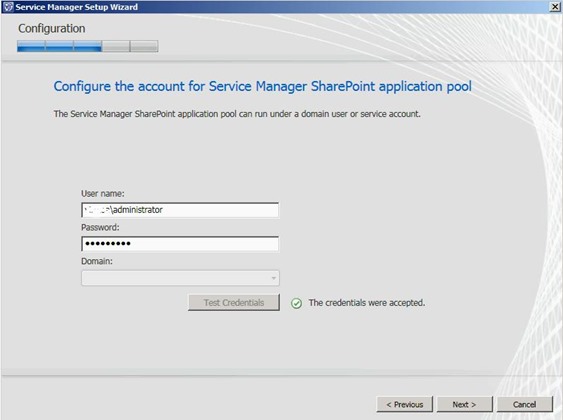
42- On the user assign screen just type the user account and Test the Credentials to verify the user account is correct and click “Next”. In my case I am using the domain admin account. ![]()
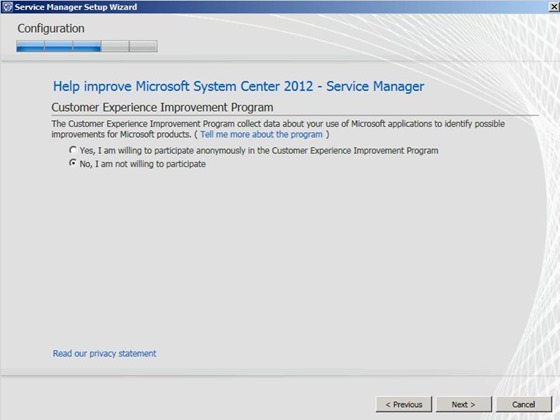
42- Select what ever the option you want on the customer experience improvements program and click “Next” to continue.
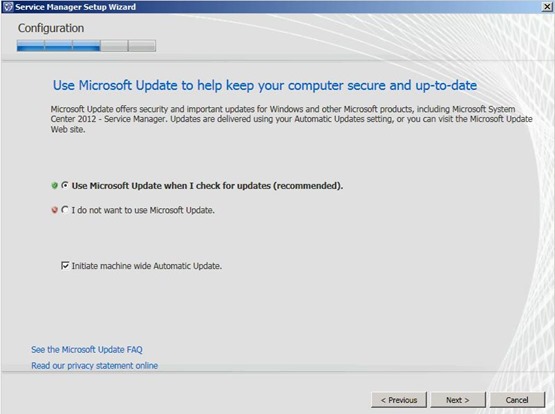
43- On the next screen select the “ Use Microsoft Update when I check for updates” and click “Next” to continue. I always recommend to have up to date patches from the Microsoft. ![]()
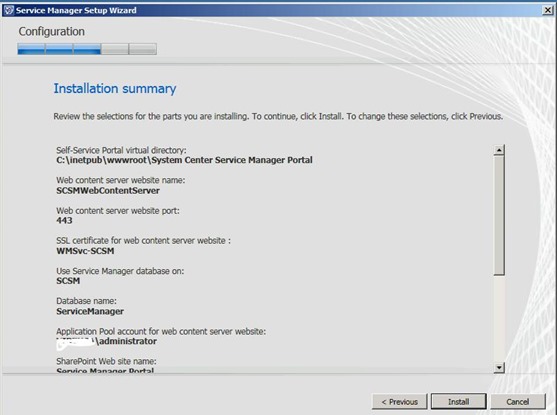
44- On the installation summary page just cross check all the settings you mentioned and once you feel good to go just press “Install” tab to start the installation.
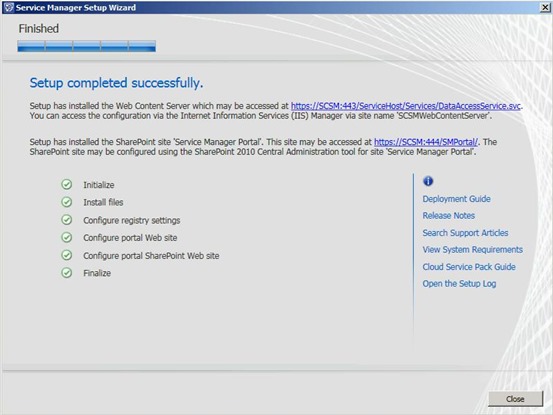
45- Once the installation is complete just “Close” to finish the installation of Service Manager Web Portal.
Now the installation has completed. So you can Open the SCSM console and carry on the work.
Conclusion
This concludes the installation of System Center Service Manager 2012. In my Next post I will cover the additional steps need to take to view the SCSM Self-Service Portal. The reason is if you open the web portal based on the above settings then it will open you a Blank Portal without any List or Category views. ![]()
On my Next post I will cover the additional settings need to carry out for SCSM 2012 WEB PORTAL.
Good info buddy.. Hope to follow this and install ASAP.
Thanks for sharing
very good! thanks for information
hey brother, I am unable to install the sharepoint foundation server…it is asking for credentials and other information and then fails…yours started automatically and shows step 2 of 10 …I dont know how…..
I have the SQL server installed on the same machine and the same machine is my AD and CA….i m installing web portal which requires sharepoint…
Ok.. Can you send me the exact error screen you receiving. Mean time you better check the step 19 to 20. Make sure all the prerequisites are met. The reason is this will install some SQL items when installing sharepoint foundation. So first verify the prerequisites are completed successfully.
yes, but how do i paste a screenshot here…?
Ok.. Do you have skydive?? If you have it upload the image there and mail me the link to methmal132@hotmail.com.
Thanks
Hi
I am getting this below error while clicking on your step
42- On the user assign screen just type the user account and Test the Credentials to verify the user account is correct and click “Next”. In my case I am using the domain admin account.
I have kept domain credential but getting error
“”Setup has failed because of unexpected error.””
Can you ping to the domain server from scsm?? Did you check nslookup??
Hi..
Nice post, but I want a few more information’s like, In my case SharePoint 2013 enterprise edition is already installed in another server. In this case how should I go ahead with self service portal installation?
If that is the case then you can use the existing sharepoint server or the server farm. You have a option to select it.
Thanks Hasitha.
Hi,
Today when I am running the setup of Self service portal I get option to install
1. Web Content Server
2.SharePoint Web Parts
When I try to install only SharePoint Web parts, I am not getting an option to select the existing SharePoint 2013 Enterprise farm which is located on a different server.
I went to use the existing SharePoint Installation of client which is on a different server than existing service manager 2012 installation.
Do I need to run the setup on sharepoint server and NOT on the service manager server. Also I need to know if I use the existing sharepoint for self service portal will it have any effect on the performance or load on the sharepoint server and existing sharepoint portal NOT Service manager self service portal? Please help
Pls chk the step 26
Thanx for good post!
This is really a good post
we currently have a different scenario we currently have SCSM 2010 configured with customized MP’s now we want to upgrade to SCSM 2012 with minimum of down time and we opted an option not to do an in-place upgradation can you suggest if our decision is good and if you have any article on upgradation from 2010 to 2012 would help me greatly…